Changing the IDOBAO ID80's RGB Settings
Recently, I built my first mechanical keyboard. It took forever, mostly due to my inexperience and initial reluctance to do things “correctly.” Namely, I was at first skeptical about the idea of lubing switches and tuning stabilizers. Why would I spend so many hours on something so fiddly? After a couple weeks of procrastinating and then watching Youtube tutorials while waiting for tools to ship to me, I did it - I figured that I’d spent way too much money on the keyboard itself to not go through the whole process.
After finally finishing the build, I plugged in the keyboard and found that it glowed bright red. The keyboard itself is quite beautiful, so I was hoping for something a bit prettier - like the rainbow lights pictured on the Drop website.
Eventually, I learned from a Youtube video that I could just press a couple of keys to change the keyboard’s RGB underglow settings. I didn’t see this documented anywhere besides that video, so I figured I’d write it down.
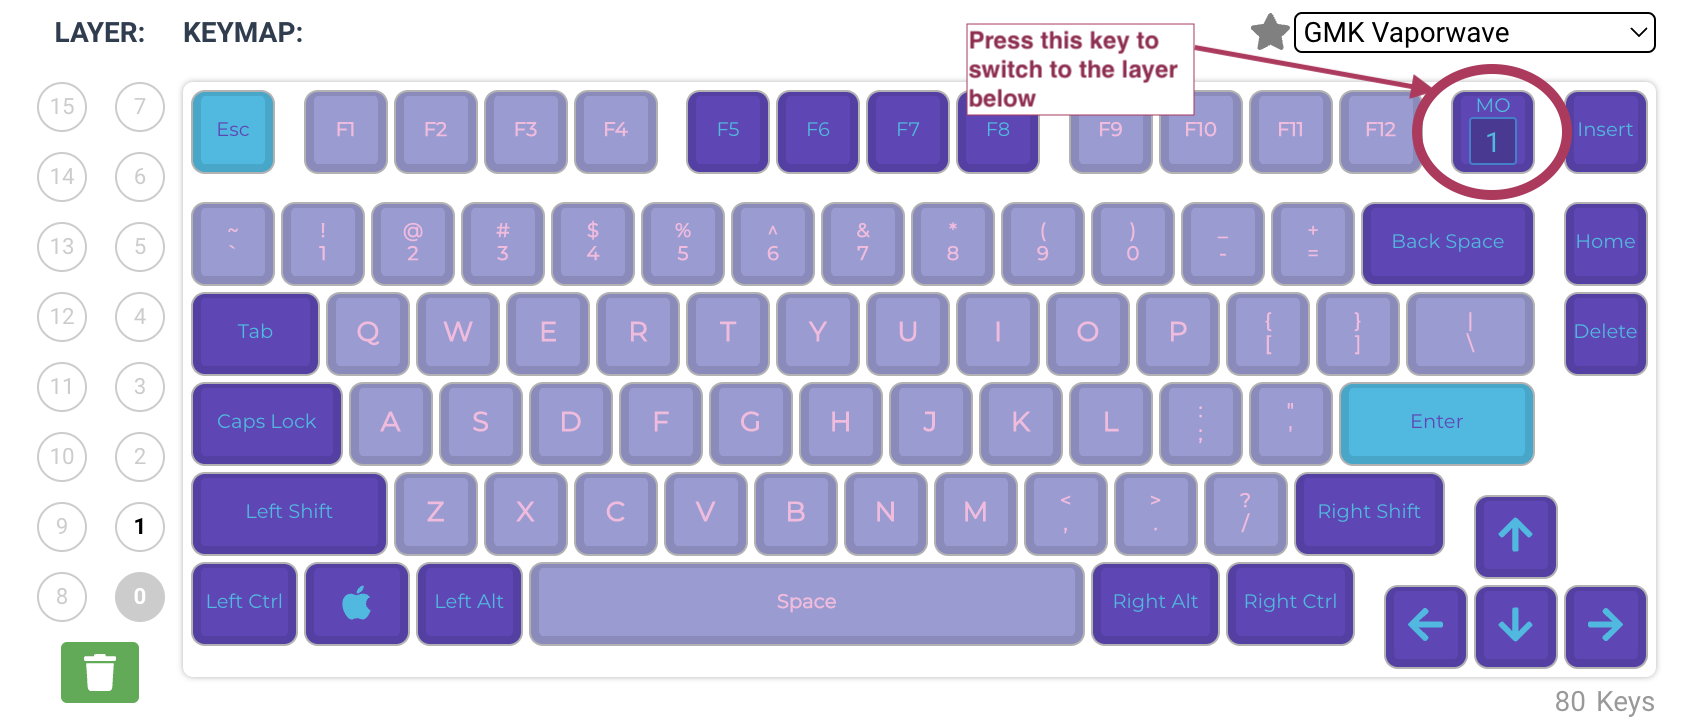
The key immediately to the right of the F12 key switches to the layer containing RGB controls - that layer exists in the keyboard by default. I learned this from the aforementioned Youtube video and from playing around with the QMK Configurator UI (here is a helpful QMK Configurator tutorial - I also used it to customize and compile keymappings).

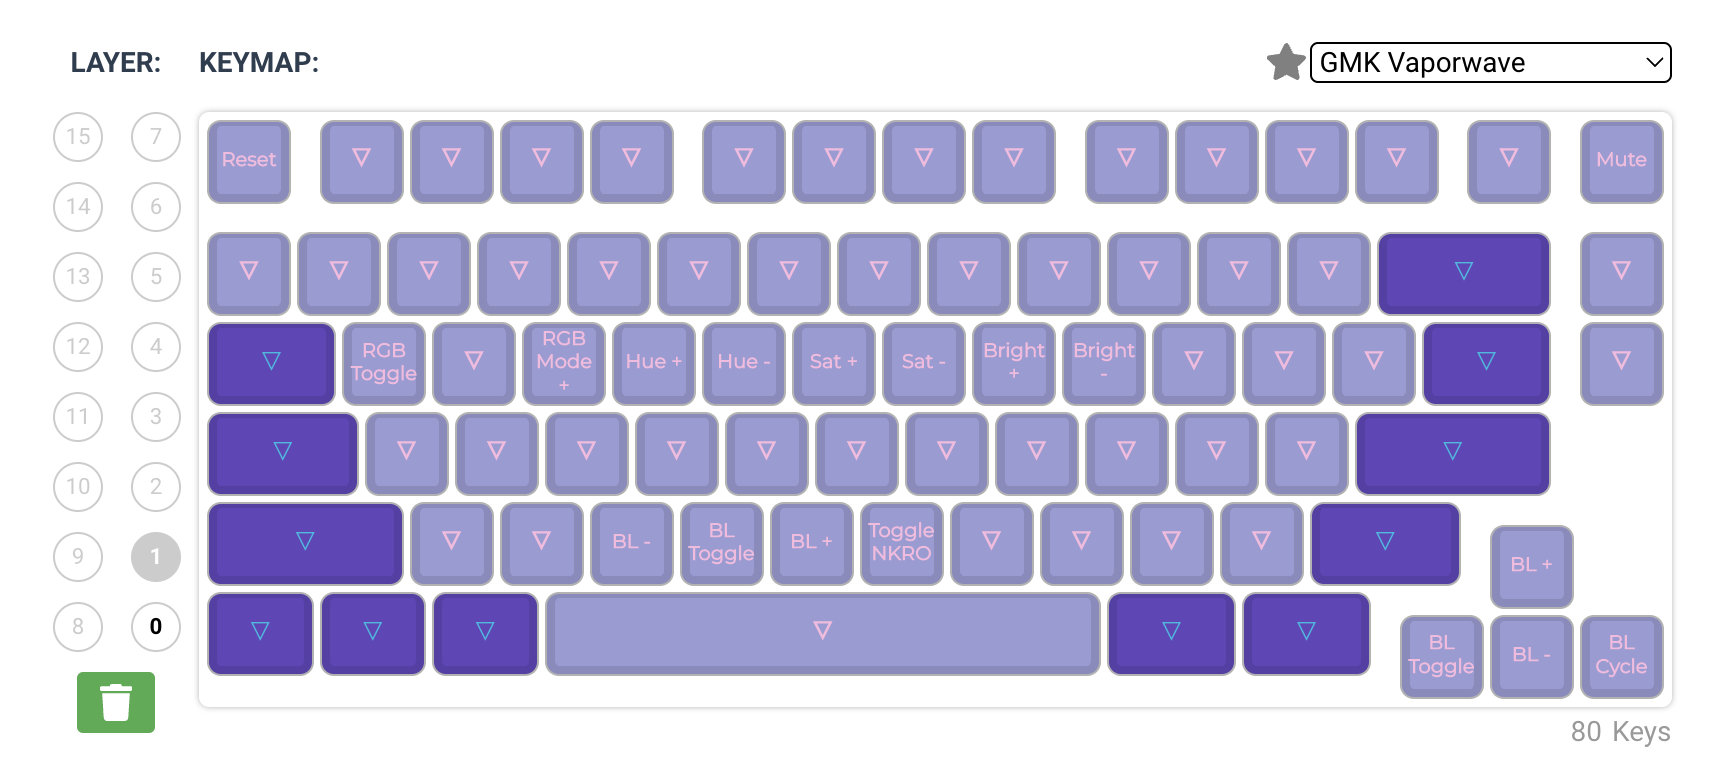
Holding that key down while pressing other specific keys controls different RGB settings. Here were a few helpful ones:
Q- Turns RGB mode off or onE- Toggles between various RGB modesR- Increase the hueT- Decrease the hueY- Increase saturationU- Decrease saturationI- Increase brightnessO- Decrease brightness
You can see that layer’s default key mappings in the QMK Configurator if you switch the view to layer 1. It looks like this:

I’ve now switched things up, but I’m sure I’ll want to revisit these settings again. This will be a helpful quick reference for myself.
As for building mechanical keyboards . . . Would I do this all again? Probably not. I like this keyboard just fine and enjoyed some of the build itself - I can definitely see why so many people love to build and customize mechanical keyboards. It’s just not the hobby for me. But I’m glad I tried it and that I now have a pretty keyboard!